When we store information in an Access for Office 365 database, text formatting (eg setting text as bold or italic, and changing font size etc) isn't normally a consideration. For example, if we have a field storing a title, it is very unlikely that we would need to save the titles' font size. This is something we can add later to a text box property of a form or report where the date is presented to the user.
 |
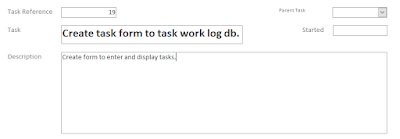
| Above: notice the text box for the task field is in a larger font with bold text. |
 |
| Above: the property sheet where the db designer sets formatting properties of the text box. |
However, there are certain instances when we do want to save formatting information relating to the data stored in a particular field of a table. This may be the case when a field contains a large amount of textual data, and we want the user entering the data to decide which text within the field is formatted in a particular way; not the database designer who can only apply formatting to all text displayed in any given text box control.
So how do we add rich text formatting to an Access for Office 365 database field?
Rich text formatting is achieved through the addition of html markup tags to the text they relate to. These are the same tags used by web pages for formatting content. However, we don't need any knowledge of HTML markup, because Access for Office 365 does it for us. All we need to do is change the TEXT FORMAT property of the field within the database table. NB this can only be done on a table field set to the LONG TEXT datatype.
Here are the instructions for setting up a LONG TEXT field for rich text formatting:
- Open (or create) the table containing the field to be set to rich text in DESIGN VIEW.
- Change the data type for the field to LONG TEXT in the TABLE DESIGN GRID.
Above: the entry field being set to LONG TEXT. - Change the TEXT FORMAT property to RICH TEXT in the field property grid.
Above: changing the TEXT FORMAT property to RICH TEXT.
We can now change from TABLE DESIGN VIEW to DATASHEET VIEW and add rich text formatting to data stored in the field we have just modified. Do this by highlighting some text within the field and selecting the desired formatting from the context menu that opens automatically. Alternatively, you can also use the TEXT FORMATTING group of icons from the HOME ribbon.
Displaying formatted data on Access for Office 365 forms and reports.
Now that we have set up the table for rich text formatting, there is one other thing we need to do if we want to display our formatted data in a text box control on a form or report. This involves changing the text box's TEXT FORMAT property to RICH TEXT.
- Open the form containing the text box we want to change in DESIGN VIEW.
- Select the text box control by clicking it in the design grid.
- Open the properties sheet by clicking the PROPERTIES SHEET icon from the DESIGN ribbon.
- Click on the DATA Tab on the properties sheet, and change the TEXT FORMAT property to Rich Text.
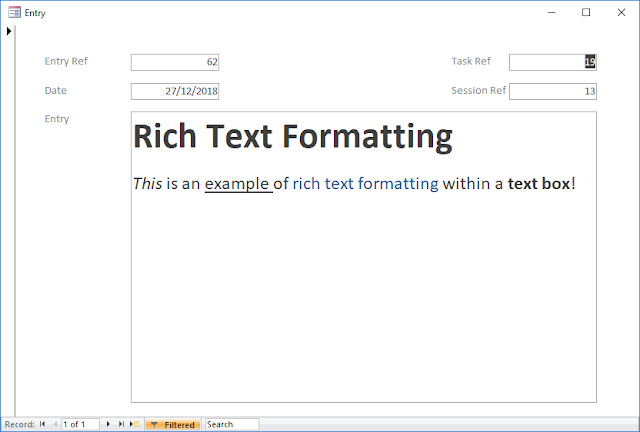
When we now re-open the form in FORM VIEW, rich text formatting is applied to any text the user had previously set before it was saved in the forms underlying table.
|
|
Above: an example of rich text formatting within an Access for Office 365 text box control.
Had we left the TEXT FORMAT property as PLAIN TEXT, any data displayed in the text box would not have been formatted; any text that should have been, would have appeared in plain text between html markup tags. |


