1/ If you have do not have an existing form to work on, begin by creating a simple form using the Access Form Wizard or clicking the Form icon
on the Access 2007 Create Ribbon.
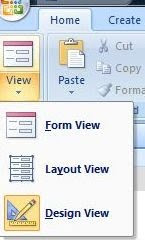
2/ When you open your form from the Navigation Window, it is ordinarily displayed in Form View. This is the view that you work in when you perform database tasks such as entering and updating records. We are going to be editing the form itself, and we do this by selecting Design View. Click the arrow under the Views Icon on the Home Ribbon. This gives you a selection of three views ie Form View, Layout View, and Design View. See screen below:

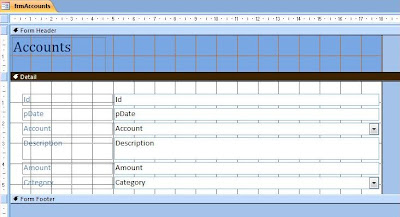
Select Design View from the drop down menu. A form in design view will look something like this:

The labels are the boxes on the left, and the text boxes, which will contain the actual data from the table, are located on the right. You are now in a position to customise the appearance of your form.
3/ To delete an unwanted text box, simply select it by clicking on once and pressing the delete key. If you select the right hand box the label will also delete automatically, but you can delete the label without also deleting the text box if you wish.
4/ You can adjust the length of a label or text box. Click the label or text box to select, and then hover the mouse on the edge of the box where there is a notch half way along the border.

At first all the text boxes may change size together as a group. To remove this grouping so that individual text boxes can be adjusted, click the small square with the cross in the centre (this appears top left of the group as you can see in the screen shot above); then click Remove from the Control Layout on the Arrange Ribbon - see below:

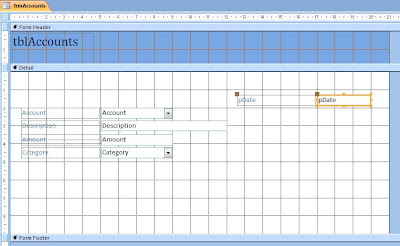
5/ You can move text boxes and labels to different areas on the form. Simply click and drag the box.
6/ You might need to increase the size of the form by clicking and dragging the edge of the design grid. To increase the size of the form vertically click the upper edge of the blue border and drag downwards. To increase the width of the form, click the right hand edge and drag to the right. You can also reduce the form size by dragging inwards.


No comments:
Post a Comment