Showing posts with label tutorial. Show all posts

Thursday, 24 November 2011

Using Events and Manipulating Property Settings - Learning Access VBA - Tutorial 4


This is the last post in the series of introductory tutorials on Learning Access VBA.  So far we have covered a wide range of areas - the VBA Development Environment, variables, referencing form controls, the conditional IF ... THEN... ELSE statement, and Loops.  There is still much more we could have covered, even at an introductory level (arrays for example).  However, I wanted to end the series by focusing on how we use VBA to automate the access database applications that we create.  To do this we are going to examine how to trigger our VBA code through tapping into events and manipulating form property values.

Using Events

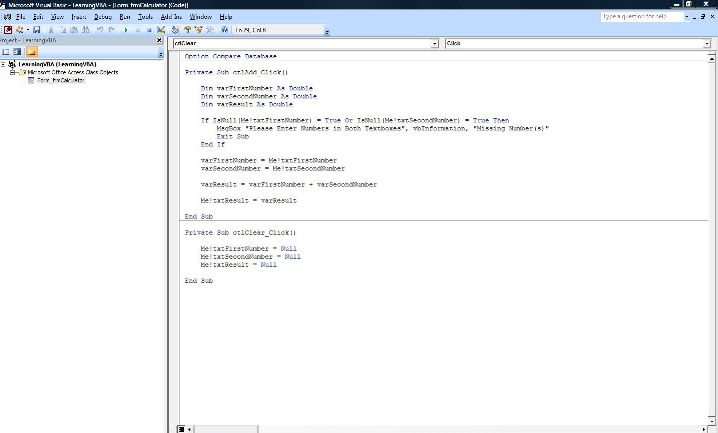
If you have been following the Learning Access VBA series, you will already be familiar with the Command Button's ON CLICK event.  The user clicks the command button at run time thereby firing the ON CLICK event, which in turn triggers any code that we have written in that event's sub routine. There are many more events which we can also use to trigger our code.  A text box control has, for example, an ENTER event and an EXIT event.  The ENTER event fires when the user moves the cursor into the text box, and the EXIT event fires when it moves out again.  The code that you may attach to such events depends entirely on the particular needs of the application.  The point is, they are there to use if we have written any code to trigger in response to the particular event in question.

So far I have only mentioned events for individual controls.  Some of the more important events, however, occur at Form or Report level.   These include the Forms ON CURRENT, BEFORE UPDATE and ON LOAD events.  The ON CURRENT event fires just before a form displays a new record; BEFORE UPDATE occurs just before the record is saved; and the ON LOAD event occurs as a form loads data contained in a table, or derived from a query.

You can see the whole range of form or reports events by opening the PROPERTIES pane (whilst in design view) and clicking the EVENTS tab.  In today's exercise, however, we are just going to focus on the form ON OPEN event.  This fires as the form opens, but before any data is loaded from the forms RECORD SOURCE.  As such it occurs before the ON LOAD even which was mentioned above.  Consequently, this is a good event to use for triggering code for tasks like prompting the user for parameters, applying filters, or even changing the form's RECORD SOURCE property.  In the exercise we shall be doing, we are going to use the ON LOAD event to determine whether a form opens in DATA ENTRY, EDIT or read only mode. Before we begin, lets first take a look at how we can manipulate form properties using VBA code.
Figure 1: Some of the Events listed in the
EVENTS tab of the PROPERTY SHEET.

Manipulating Properties

You may already have experience of setting properties in Design View using the PROPERTIES sheet .  With VBA we can also read, test and dynamically change property setting during runtime.  The key to doing this is understanding how to correctly reference the property of the control, form or report.  This task is easier when our code is contained within the VBA Module of the form or report being referenced.  Suppose we want to reference the DATA ENTRY property of a form called frmCustomers.  If we were referencing the property from the VBA module attached to frmCustomers we can use the ME keyword.  This acts as a short cut when referencing the attached form.  This is how it works:

Me.DataEntry


If, on the other hand, we were attempting to make the same reference from a module outside of frmCustomer we would need to write the full reference like this:


Forms![frmCustomers].DataEntry


As you can see, we not only need to write the name of the form in question but we also need to specify the FORMS collection object to which it belongs.  It is also worth pointing out that in VBA we use the exclamation mark (!) to separate two objects when the preceding object belongs to the one coming after, but we use the full stop (.) to separate an object from one of its properties.  Any formreport or control name in the reference also need to be contained within square brackets if the name contains a space or a reserved word (but this is not essential if the name is constructed without these 'problematic' elements).


Now we know how to create property references, we can use them in our code to read, test or dynamically change property values. For example:


To store a property setting in a variable called varDataEntry:
    varDataEntry = Me.DataEntry


To test the value of a property setting:
    If Me.DataEntry = true Then


To change the value of a property setting:
    Me.DataEntry = False


Exercise

In the following exercise we are going to create a switchboard form with three command buttons - these are ctlAdd, ctlEdit and ctlRead. All three buttons open the same form, frmContacts, but the first button opens the form in Data Entry mode, the second in Edit mode and the third as Read Only.  So how does it do this?

Figure 2: frmSwitchboard
When the user clicks one of the command buttons, it fires the command button's ON CLICK event where there is some VBA code to open the form with the DoCmd.OpenForm method.  One of the parameters of the OpenForm method passes an OpenArgs parameter to frmContact.  The value of this parameter (which is a string) is then stored by Access in frmContacts OPENARGS (Open Argument's) property.

As frmContacts opens, the ON OPEN event fires, triggering another block of VBA code.  This code tests the value of the forms OPENARGS property using the IF ... THEN ... ELSE statement. This is to ascertain whether the value contained in the OPENARGS property is  "Add", "Edit" or "Read".  These were passed by the OpenForm method as mentioned above.  If the OPENARGS property value is "Add" our code will set the form's DATA ENTRY property to TRUE; if the value is "Edit", DATA ENTRY is set to FALSE; if "Read", the DATA ENTRY, ALLOW ADDITIONS, ALLOW DELETIONS, and ALLOW EDITS properties are all set to FALSE.

You can download the completed solution by clicking this link: Events and Properties Exercise.  The instruction for creating the exercise follow below:

Stage One - Creating the Switchboard

  1. Create an unbound switchboard form called frmSwitchBoard.
  2. Add three Command Buttons called ctlAdd, ctlEdit, and ctlRead.
  3. Attach the following code to the Command Button's ON CLICK event - see the first tutorial in the Learning AccessVBA series if you need help doing this.
Private Sub ctlAdd_Click()
    DoCmd.OpenForm "frmContacts", , , , , , "add"
End Sub


Private Sub ctlEdit_Click()
    DoCmd.OpenForm "frmContacts", , , , , , "edit"
End Sub


Private Sub ctlExit_Click()
    Application.Quit   
End Sub


Private Sub ctlRead_Click()
    DoCmd.OpenForm "frmContacts", , , , , , "read"
End Sub

NB You may have noticed there are a number of blank parameters passed in our use of the OpenForm method - hence the comma's .  That is because many of the parameters are optional.  We are just passing two parameters - the name of the form to be opened, and the OpenArgs parameter as discussed above.   Incidentally we could have used the DataMode parameter to accomplish the object of this exercise more directly, but I wanted  to demonstrate the working of the form ON LOAD event.

Stage Two - Creating frmContacts


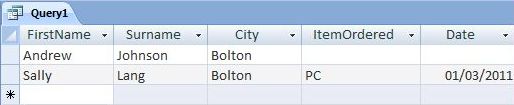
Before you create frmContacts you will first need to create the table - tblContacts - which is going to be its record source.  It's not particularly import which fields are used, but the example database I created has four fields - ID, FirstName, Surname and Company, and the following sample data:

Figure 3: tblContacts with sample data.
Figure 4: frmContacts

  1. Create a new form called frmContacts
  2. Set the forms RECORD SOURCE property to tblContacts.
  3. Add the four fields of tblContacts to the form
  4. Add the following code to the forms ON OPEN event:

Private Sub Form_Open(Cancel As Integer)

    If Me.OpenArgs = "add" Then
        Me.DataEntry = True
    ElseIf Me.OpenArgs = "edit" Then
        Me.DataEntry = False
    ElseIf Me.OpenArgs = "read" Then
        Me.DataEntry = False
        Me.AllowAdditions = False
        Me.AllowDeletions = False
        Me.AllowEdits = False
    End If 
  
End Sub


When you have done this, save your work, and open the switchboard to try out the different buttons.

This concludes the Learning Access VBA series of tutorials.  I hope you have found them helpful, and that they have given you a basic introduction to Access programming .  I intend to cover more advanced VBA topics next year.

Friday, 18 November 2011

Introduction to VBA Loops - Learning Access VBA Tutorial 3

This is the third tutorial in the Learning Access VBA series. In the first tutorial we learnt how to create a simple VBA Sub Procedure and set up up Variables; and in the second, we looked at Evaluating Conditions with the IF THEN ELSE statement.  Today we are going to move on to VBA Loops.

Loops are are common feature of most programming languages, and VBA is no exception.  Loops enable lines within in a defined section of code to be repeated as many times as is necessary, until a specific point is reached when the program flow may move on to the next section of code.  There are different kinds of loops in VBA.  The FOR ... NEXT loop, for example, repeats the loop a set number of times.  We would use  this if we wanted the loop to repeat, say, 10 times, and then move on.  With the DO ... UNTIL loop, on the other hand, the defined section of code would repeat indefinitely, until a specified condition arises.  This may be something to use if you want to repeat the loop until a user enters a specific value into an input box.


The FOR ... NEXT Loop

Let take a look at how the FOR ... NEXT loop is constructed.

For I = 1 To 10
    lines of code to be repeated
Next I

The FOR NEXT loop has a counter which is referred to above as I.  This is basically a variable name - we could have called it a different name if we had wanted.  The first line of the statement (For I = 1 to 10) sets the counter at 1, and tells the procedure to continue repeating the lines of code until the counter reaches 10.  Each time the program flow executes the NEXT keyword at the end of the statement, the counter is increased by 1.  As it does so, it also checks whether the counter has reached 10 (or whatever level it had been set).  If it has not, the lines of code repeat another time until the Next keyword executes again, increasing the count by another 1.  Once it reaches the level set, the program flow continues past the NEXT keyword into the next section of code.

So let's try an exercise to see how the FOR ... NEXT loop works in practice.

  1. Create a new unbound form in Design View.
  2. Add a Command Button.
  3. Add the VBA code (listed below) to the button's OnClick Event (please see the first Learning VBA Tutorial if you need help with this, or any of the previous steps):
  4. Click the SAVE icon.

Dim I As Integer
Dim x As Integer    
Stop
For I = 1 To 10    
    Randomize
    x = (9 * Rnd() + 1)
    Debug.Print "Counter = " &  I  & ";  Random Number = " &  x        
Next I

Before we try out the code, we are going to open the VBA Editor's Immediate Window.  To do this,  click the VBA VIEW menu, and then click IMMEDIATE WINDOW from the menu list.  When we run the code, the STOP statement will re-open the VBA editor during runtime, to allow us to Step Into each
line of code as it executes.  Then when the program flow reaches the Debug.Print line, the Counter value and the value of variable x (a random number generated by the code) is displayed in the immediate window.

When you are ready, open the Access form and click the command button we created earlier.  The VBA editor will then open.  The current line being executed is highlighted in yellow.  To advance to the next line we click Step Into from the DEBUG menu (alternative use the F8 key which is far more convenient).  Then watch what happens as the program flow progresses through the loop.  Also take note of the counter value which is displayed before the random number in the immediate window.

Figure 1: The VBA Editor with Immediate Window.  The editor was opened during
run time due to the STOP command which acted as a breakpoint.
Another way of adding a break point is to click on a line
and then select TOGGLE BREAKPOINT from the DEBUG menu.
The DO ... UNTIL Loop

Let's take a quick look at the how the DO ... UNTIL loop is constructed.

Do Until variableName = thisValue
    lines of code to be repeated
Loop

The first line of the DO ... UNTIL loop is testing whether the specified condition is true or not.  If it is not true, the lines of code within the loop are executed until the LOOP keyword is reached at the end of the statement. Then the program flow returns to the first line of the statement where the condition is tested again.  If the lines of code within the loop had changed the value of the variable being tested so the condition becomes true, the program flow exits the loop at this top line.

Here is an example of a DO ... UNTIL Loop that you may  like to try for yourself.  Just change the code from the first exercise so that this runs in its place.


Dim varNumber As Integer
Dim varResponse As Integer
    
Randomize
varNumber = 9 * Rnd() + 1


Do Until varResponse = varNumber
        
    varResponse = InputBox("Enter a Number Between 1 and 10", "Guess A Number")
        
    If varResponse > varNumber Then
        MsgBox "Your Guess is too High"
    ElseIf varResponse < varNumber Then
        MsgBox "Your Guess is too Low"
    Else
        MsgBox "Congratulations: Your Guess is Correct."
    End If
        
Loop
    
    MsgBox "Game Over!!!"

(NB for the sake of clarity, this code does not deal with the possibility that the user may click cancel or enter an empty value in the input box.  If this happens an error results, and the procedure crashes!)

This code is for a simple Guess the Number Game.  The user clicks the command button to begin.  The code then generate a random number and stores it in a variable called varNumber.  Once the program flow gets to the loop, the variable varResponse is tested to determine whether it is equal to the random number stored in varNumber.  If it is not, the lines of code within the loop are executed.  The user is asked to guess the number in a pop up input box.  The code then enters an IF ... THEN ... ELSE statement where the user is informed whether his guess is too high, too low, or is indeed correct.  When the LOOP keyword is reached, the program flow returns to the DO UNTIL keyword where the value of the guess is tested against the random number to determine whether the lines of code should be repeated, or whether the program flow can continue past the LOOP keyword.

When you try this code, please feel free to enter a BREAKPOINT so you can follow the program flow for yourself.  You can do this by entering the STOP statement as we did in the first exercise.  Alternatively, click the line where you want to insert the breakpoint, and then click TOOGLE BREAKPOINT from the DEBUG menu.  The line is then highlighted in red., but the action is the same.

Friday, 11 November 2011

Evaluating Conditions with the If...Then...Else Statement - Learning Access VBA. Tutorial 2.

This the second post in the Learning Access VBA series.  Last week I introduced you to the VBA Development Environment where we we also learnt a little about variables.  We completed a simple exercise which referenced the values entered by the user into two text boxes, stored the values in variables, and added the values contained therein together. The result was then displayed in a third text box.  This week we are going to move on, and look at how VBA deals with Conditions using the If ... Then ... Else Statement.

So what do we mean by the term conditions or the Conditional?  Basically as our VBA code is executed (that is to say, as the code runs, line by line, processing each statement in turn) the program flow may well reach various points where it needs to branch according to whether a given condition has or has not been met.   For example, we may want our code to run a short block of nested code if the value of a specified variable is greater than a given number.  If the condition is met, the program flow runs the statement contained in the nested code below; whereas, if the condition is not met, the program flow may branch to the next statement after the nested code - the nested code is, in effect, skipped.

Lets take a look at how the If ... Then ... Else Statement is constructed:

IF conditon is met THEN
        nested code1
ELSE
        nested code2
END IF
 
The IF keyword tests whether the condition is true or not.  If it is true, the THEN keyword directs the program flow to the code contained in nested code1ELSE is optional. If we use it, ELSE directs the program flow to that contained in nested code2 if the condition after the IF keyword had not been met.  Had we not used the ELSE keyword (with nested code2), the program flow would have skipped nested code1 and gone straight to the END IF keyword.

So, for example, our code may read: 


IF varFirstNumber > varSecondNumber THEN
        MsgBox("First Number is Greater than Second Number")
ELSE
        MsgBox("First Number is not Greater than Second Number")
END IF


This tests whether the number contained in variable varFirstNumber is greater than that contained in varSecondNumber.  If the condition was met, the nested code below the IF keyword would run.  This displays a message box saying "First Number is Greater than Second Number".  If the condition was not met, the nested code below the ELSE statement would have run instead.  This would have displayed a message box saying "First Number is Not Greater than Second Number".  The END IF keyword closes the If ... Then ... Else Statement.


There is one other optional keyword which is well worth mentioning - that is ELSEIF.  When we only use IF/THEN and ELSE, we have just two possible branches in the program code.  However, suppose there are three or more possible conditions?  For example, suppose we want to test whether the variable varFirstNumber is (a) greater than, (b) less than, or (c) equal to, the second variable?  ELSEIF is a good way to do this.  Lets see how we would code this scenario:


IF varFirstNumber > varSecondNumber THEN
        msgbox("First Number is Greater than Second Number")
ELSEIF varFirstNumber < varSecondNumber THEN
        msgbox("First Number is Less than Second Number")
ELSE
        msgbox("First Number is Equal to Second Number")
END IF


As we can see, the ELSEIF keyword has allowed us to enter a second specified condition to test, in the event of the initial condition proving false.  


As such, when the program flow reaches the If ... Then ... Else Statement, the initial condition is tested by the first IF keyword; if this is true, the nested code in the line directly below is executed, and then the program flow branches to the END IF keyword at the bottom of the statement.  However, if the first condition had been false, the first block of nested code is skipped, and the program flow goes to the ELSEIF keyword and the second conditional expression is then tested; if this proves true, the second block of nested code is executed.  However, if the 2nd expression had also proven false, then the 2nd nested code would also be skipped, and the program flow would move down to the ELSE keyword.  There is no condition to test here, so the 3rd block of nested code is executed unconditionally.


(NB In the above scenario there were three possible outcomes.  However, it is also worth mentioning that by adding additional ELSEIF keywords into the statement, the number of possible conditions to test is potentially endless.)


Compare Numbers Exercise


Let's end this tutorial by applying what we have learnt above to the following exercise.    

We are going to create a form with two text boxes named txtFirstNumber and txtSecondNumber.  Then we will add a command button, ctlCompare, with some code attached to it's ON CLICK event.  We learnt how to do this in last weeks Learning Access VBA tutorial. However this time our code will compare the numbers entered into the two text boxes by the user at runtime, and display a message box informing the him/her whether the First Number is (a) Greater than, (b) Less than, or (c) Equal to, the Second.

This is a screenshot of our form in action:

Here the user has entered 10 in txtFirstNumber and 20 in txtSecondNumber.
After the user clicks the Compare command button, Access runs the VBA code
that compares the two numbers and displays the appropriate message.
Instructions

I won't go into great detail regarding instructions - we should have leant all the required skills from last weeks post on Learning Access VBA.  There is also more information about creating an unbound Access Form in the post about Creating an Access Form from Scratch.  I advise you to check out these posts if you need a reminder:
  1. Create a new unbound Access Form.
  2. Add two text boxes called txtFirstNumber and txtSecondNumber.
  3. Add a Command Button called ctlCompare.
  4. Select the Command Button and open the PROPERTIES SHEET.
  5. Click the Events tab of the PROPERTY SHEET.
  6. Click the three dots symbol  (...) on the right of the ON CLICK property cell.
  7. Open the VBA Editor by clicking CODE BUILDER from the CHOOSE BUILDER menu.
  8. Copy and paste the code listed below (excluding the first and last line which should have been added to the VBA editor automatically).
  9. Click the save Icon and close the VBA Editor.

Private Sub ctlQuestion_Click()

    Dim varFirstNumber As Integer
    Dim varSecondNumber As Integer
    
    varFirstNumber = Me!txtFirstNumber
    varSecondNumber = Me!txtSecondNumber
    
    If varFirstNumber > varSecondNumber Then
        MsgBox "First Number is Greater than Second Number"
    ElseIf varFirstNumber < varSecondNumber Then
        MsgBox "First Number is Less than Second Number"
    Else
        MsgBox "First Number is Equal to Second Number"
    End If
    
End Sub

To test out the code, open your form in FORM VIEW, enter a number in each of the text boxes, and click the COMPARE button.  NB for clarity there is no code to validate whether two numbers have been entered in the text boxes.  An error message will result if one or both of the text boxes is empty when the compare button is clicked.

The code begins by declaring two variables, and then assigns values to each one by referencing the two respective text boxes (see Learning Access VBA for more information about this process).  The If ... Then ... Else statement then tests whether the first number is greater than, less than or equal to, the second number.  A message box opens containing the result.

Friday, 4 November 2011

Learning Access VBA - A Beginners Guide

This post is all about getting started with the Access VBA programming language -  a first tutorial starting right at the beginning.  As you may already know, the Access Database comes with its own programming language called Visual Basic for Applications, or VBA.  It offers a powerful way to automate and generally control how an access database application operates.  However, whilst relatively easy to use, getting started can seem a little daunting to the newcomer.  As such, this tutorial is intended to help the beginner feel at home in the programming environment.

Figure 1: The Visual Basic Icon
The first problem faced by the beginner is finding out how to get into this thing called VBA.  This is because, technically, VBA is a separate software package which works alongside Access.  That said, we can only open the VBA Editor (see figure 2 below) from within the Access database itself.  The most direct way of doing this is by clicking the VISUAL BASIC icon (located in the MACRO's group of the DATABASE TOOLS ribbon - see figure one above).  You might like to download the Learning Visual Basic Sample Database, and give this a try.

Learning Visual Basic Sample Database

Figure 2: The VBA Editor
The sample database consists of an unbound form which acts as a simple calculator.  There are three Text Boxes and two Command Buttons.  The user enters two numbers in the top two text boxes and clicks the  equals (=) buton.  This runs a block of VBA code (called a sub procedure) which reads the numbers from the two text boxes, adds them together, and displays the result in the third text box.  The user can then click the Clear button (C). This runs a different block of code to clear all the existing numbers from the text boxes so new numbers can be entered and calculated.

Figure 4: The Simple Calculator form
described in the paragraph above.
So lets take a look at how this is created.  We shall do so in two stages: first we shall create the form, then open the VBA Editor and enter the two blocks of code.

Creating the Form
  1. Click the FORM DESIGN icon (located in the FORMS group of the CREATE ribbon).
  2. Drag and drop three text boxes on the the form (if you need help, you might like to check out my tutorial on how to Create an Access Form from Scratch).
  3. Next drag and drop the two Command Buttons onto the design grid.  Make sure the USE COMMAND WIZARDS icon is not highlighted when you do this - otherwise just click the CANCEL button if the Command Button Wizard opens.
  4. Click on the label for the top text box and change the text to read "First Number".
  5. Repeat step 4 for the second and third labels, entering "Second Number" and "Result" respectively.
  6. Then click on the top text button and change the text to "C". This will be the Clear Button.
  7. Do the same for the lower text button, changing the text to "=".  This will be the Equals Button.
  8. Next click the PROPERTY SHEET icon (located in the TOOLS group of the DESIGN ribbon).
  9. Set the NAME property (located at the top of the OTHER TAB of the PROPERTY SHEET) for the first text box to txtFirstNumber.  
  10. Repeat step 9, calling the lower two text boxes txtSecondNumber and txtResult, and calling the Command Buttons ctlClear and ctlAdd. 
NB It is important to enter the NAME properties correctly.  Although we could have called them anything we wanted, our VBA code refers to these form controls via the NAME property.  As such we need to ensure that the names used on our form are going to match those to be used in the code.  This is an important principle to grasp as we use VBA alongside Access.

Entering the VBA Code
  1. Next click on the ctlAdd (=) Command Button whilst our form is still open in DESIGN VIEW.
  2. Open the PROPERTIES SHEET (if it is not already open) and click the EVENTS tab ctlAdd.
  3. Click the cell for the ON CLICK property.  Then click the three dots button (...) at the right of the cell.  This opens the CHOOSE BUILDER dialog box.
  4. Select CODE BUILDER from the menu items, and click OK.  This opens the VBA Editor in the exact location where we are going to enter the code which is triggered when the user clicks the button at runtime (the ON CLICK Event).  It even writes the first and last line of code which makes this a self contained block of code (a Sub Procedure).
  5. Enter the code (listed below) between the Private Sub and End Sub lines:

Private Sub ctlAdd_Click()

    Dim varFirstNumber As Double
    Dim varSecondNumber As Double
    Dim varResult As Double
    
    If IsNull(Me!txtFirstNumber) = True Or IsNull(Me!txtSecondNumber) = True Then
        MsgBox "Please Enter Numbers in Both Textboxes", vbInformation, "Missing Number(s)"
        Exit Sub
    End If
    
    varFirstNumber = Me!txtFirstNumber
    varSecondNumber = Me!txtSecondNumber
    
    varResult = varFirstNumber + varSecondNumber
    
    Me!txtResult = varResult
        
End Sub

Now repeat all of the last stage from 1 to 5, but this time for the ctlClear Command Button.  Enter the following code in the same manner as above:

Private Sub ctlClear_Click()

    Me!txtFirstNumber = Null
    Me!txtSecondNumber = Null
    Me!txtResult = Null
    
End Sub

When this is complete, you may save your code by clicking the SAVE icon, and close the VBA Editor.  To test the code simply open the form in FORM VIEW, enter the numbers to calculate, and click the ctlAdd button.  The correct result should display in the third text box once this is done.

How the Code Works


Please don't worry about being able to create this code yourself at this stage in the learning process.  The main purpose of this tutorial was to get you familiar with the programming environment, rather than how to construct the code.  I intend to do this in future tutorials.  However, we will go through each line of the first sub procedure just to give you a general idea of how the programming code works.

The code is triggered by the Command Button's ON CLICK event.  The user clicks the command button, Access 'raises' the ON CLICK event, and the block of code runs one line at a time.

Private Sub ctlAdd_Click()
The first line, the SUB Statement, was created automatically by Access when we opened the VBA Editor from the property sheet.  It's purpose is to mark the beginning of this block of code or Sub Procedure.  The PRIVATE part of the statement relates to the concept of Scope.  We won't worry too much about what this means at this stage, except to say it is concerned with where the sub can be 'called' from.  Private means just that - it is private to this particular form module, and can not be called from a module elsewhere in the application.  The part which says ctlAdd_Click is the name of the sub procedure. 


Dim varFirstNumber As Double
Dim varSecondNumber As Double
Dim varResult As Double
The next three lines of code declare three separate variables.  The purpose of variables are to enable values to be temporarily stored, processed, and retrieved.  More about this soon. At this stage we are just going to note that we have used the DIM Statement to define three variables called varFirstNumber, varSecondNumber and varResult.  We have also included AS DOUBLE to tell Access that the variables are going to store values of the DOUBLE data type (so we can calculate decimal numbers). 


 If IsNull(Me!txtFirstNumber) = True Or IsNull(Me!txtSecondNumber) = True Then
     MsgBox "Please Enter Numbers in Both Textboxes", vbInformation, "Missing Number(s)"
     Exit Sub
 End If
This next section of code is an IF Statement, and  forms a self contained block of code within the sub procedure itself.  It was something I added to ensure the user enters a number in each of the two text boxes. If it detects that there is a Null value it runs the nested code to display a message box, and then exits the sub. 

varFirstNumber = Me!txtFirstNumber
varSecondNumber = Me!txtSecondNumber

In this section of code, we are assigning each of the two variables with a value.  The equals sign assigns the variable name on the left of the sign with the value on the right.  In this case the top line is setting the value of the varFirstNumber variable to the value entered by the user in the txtFirstNumber text box control.  Note that the text box is referenced by means of the code: Me!txtFirstNumber.  The Me! part of this is telling access that the text box belongs to the form to which this VBA module is attached ie frmCalculator; and txtFirstNumber is the name we gave to the top text box on the form we created earlier.

varResult = varFirstNumber + varSecondNumber
This line is assigning the variable varResult with a value.  In this case the value being assigned is the sum of the values stored in varFirstNumber and varSecondNumber.  Put another way, this line is performing the addition calculation and storing the result in the variable varResult.

Me!txtResult = varResult
This line is using the value stored in the varResult variable to set the value to be displayed in the lower text box of the form, txtResult.  It references the text box in the manner already described above.  This time, however, the text box reference is on the right hand side of the equals sign, and the variable on the left.  This is because the value of the variable is being retrieved, and the value of the text box is being set.


End Sub
This line was generated automatically just like the first in this block of code.  However, this time it is marking the end of the sub procedure.


Try this Yourself
If you are feeling adventurous, you might like to try creating more Command Buttons for the Calculator form.  Try creating a button to multiply or subtract the values stored in the top two text boxes.  You can follow the same procedure as before.  However, when you copy and paste the code, change the addition operator (+) in the appropriate line for multiply (*) and subtract (-) respectively.

Friday, 29 April 2011

The Many to Many Relationship

Last month we learnt how to create a comparatively simple One to Many Relationship.  In this post we shall go one step further and create a Many to Many Relationship in the context of a Customer Orders database.

The Many to Many Relationship differs from the One to Many, in that the latter involves just two tables.  The table on the One side of the relationship potentially having multiple corresponding records in the table on the Many side.  It is depicted in the Access Relationships window like this:

Figure 1: The One to Many Relationship.
By contrast the Many to Many Relationship consists of three tables.  The two tables on the Many sides of the Relationship are joined to a third Junction Table connecting them together.  It is depicted in the Access Relationships window like this:

Figure 2: The Many to Many Relationship.
In the screen-shot above, we see that tblOrder and tblProducts are joined together in a Many to Many Relationship.  TblOrderDetails is the third Junction Table mediating between the two. This mediation takes the form of two ordinary One to Many Relationships, with the junction table set up to be on the Many side of both. Let us now examine the reason why this is so.  

When a customer makes an order, there may be a number of products purchased.  As such we have a One to Many scenario - One order potentially 'containing' Many products. However, one type of product may also appear in a number of different orders.  This too, is a one to many scenario, but this time going in the opposite direction. As such, we need the Junction Table in between to record each product appearing on a particular order, and each order where a particular product appears.

One more thing: you may notice that there seems to be two primary keys pictured in the Junction table of Figure 2 above.  These are also the foreign keys from the other two tables in the relationship. There is really only one primary key, but it consists of the unique combination of the two primary keys from the two tables on the Many sides of the relationship.  As such, one particular product type can only appear in any particular Customer Order once, and vice versa.  

To understand this more clearly, you may find it helpful to visualise the layout of an invoice.  Each individual invoice pertains to a particular order for a particular customer.  The invoice includes a list of all the different products purchased for that order.  The same product types may also appear on different invoices (for the same or different customers).  The data from these lists are derived from the Junction table.
   

Creating a Many to Many Relationship


Lets have a go at creating a Many to Many Relationship ourselves.  We will begin by downloading a database containing tblOrder and tblProducts .  There is also another table called tblCustomer which is joined to tblOrder in a One to Many Relationship.  We will then create the tblOrderDetails Junction Table and the Joins which make up the Many to Many Relationship.

Setting up the Exercise
  1. Download or create the tables to be used in this exercise - ManyToMany_Exercise Tables.
  2. Open the database and select the DATABASE TOOLS ribbon.  
  3. Click the RELATIONSHIPS icon in the SHOW/HIDE group.  Here are the tables we are starting off with.

    Figure 3: Start of Many to Many Exercise

Create Junction Table
  1. Select the CREATE tab on the Access Ribbon.
  2. Click the TABLE DESIGN icon from the TABLES group.
  3. Enter the first two fields in the TABLE DESIGN GRID.  This is OrderId and ProductId.  Select NUMBER as the DATA TYPE for both fields.
  4. We now need to designate both these fields as the joint primary key.  Select both rows by holding down the CONTROL key on your keyboard and clicking the two blue sections on the far left of the Grid.  Both rows are then highlighted.  You can now click the PRIMARY KEY icon in the TOOLS group of the DESIGN ribbon.  Two primary key symbols appear now on the far left of the two rows.

    Figure 4: Selecting the Primary Key on two fields.

  5. Add the remaining two fields to the Grid.  These are Quantity (DATA TYPE: NUMBER) and CostPerUnitPaid (DATA TYPE: CURRENCY).
  6. Close the table, saving it as tblOrderDetails when prompted.
Creating the Joins
  1. Select the DATABASE TOOLS tab on the Access Ribbon.
  2. Click the RELATIONSHIPS ICON in the SHOW/HIDE group.
  3. The Junction Table we just created cannot be seen at first.  To make it visible, click the SHOW TABLE icon in the RELATIONSHIPS group of the Access Ribbon.  Double click tblOrderDetails from the SHOW TABLE dialogue box to add it to the RELATIONSHIPS window.  Close the SHOW TABLE dialogue box.
  4. Click and drag the new table to a location between tblOrder and tblProducts.
  5. We are now going to create a One to Many Relationship between the ID field of tblOrder, and the OrderId field of tblOrderDetails.  Do this by clicking  the tblOrder.ID field, and dragging over to tblOrders.orderId.  When you release the mouse key the EDIT RELATIONSHIPS dialogue box opens.  Click the three tick boxes and click the CREATE button to create the relationship.

    Figure 5: The Edit Relationship Dialogue Box.

  6. Next we need to create a One to Many Relationship between the tblProducts.ID field and tblOrderDetails.productId.  Follow the same procedure as above to create this relationship.
The Many to Many Relationship is now in place.  Your RELATIONSHIPS window should now look like this:

Figure 6: The Many to Many Relationship.


Lets end this post by taking a brief look at the Many to Many relationship in action.  Obviously we have not created any tables or reports to enter or display information in a user friendly manner (this is something I hope to cover in a future post).  We can, however, see how all this information is connected together using the example of a single order.

The screen-shot below shows an order which I created for one of the customers in the customer table.

Figure 7: Three nested tables showing an order made by customer Tracey Smith.
As you can see there are three nested tables. The top level table shows the customer record from tblCustomer.  The name of the customer here is Tracey Smith and her customerId is 2.  The mid-level table shows the order record from tblOrder. There is just one order on the database for this customer.  The order ID is 18, and the orderDate is 28/4/2011.  The inner table shows the order details from tblOrderDetails. As you can see there are four product items for this order.  The product ID's are 3,2,1, & 5. The customer ordered one of each item (see the quantity field).

In the next screen-shot (figure 8) we see the products table. Each row is expanded to show a set of records from tblOrderDetails corresponding to them.  As such, we see the orders within which each product appears:

Figure 8: The Products Table (tblProducts) showing the order details (tblOrderDetails) for each item.

As you can see, Order 18 (which we looked at above from the Customer Order side of the Many to Many Relationship) is seen here from the Product side, along with all other orders.  If you look carefully you will see that an instance of OrderId 18 appears under each productId (ie 3,2,1, & 5) which we mentioned above.  As such we see how the data contained in our tables appears from both sides of the Many to Many Relationship.

Of course, this is a somewhat fragmentary perspective from which to view our data.  That is why we need  forms, queries, and reports to enter, process and display all this information in a user friendly manner.  This is something that I hope to cover in a future post.

Friday, 22 April 2011

The Outer Join Query

In my last blog post we learnt about the Inner Join Query, and had a go at creating one.  In this post we are going to do the same, but this time with the Outer Join Query.  Let us begin by looking at how the two different Join types differ.

Query Joins in general connect two or more tables so that the query results present data as though it is from a single table.  This is done in a coherent manner whereby corresponding records from separate tables are presented with each row of data in the query results matching.  In the previous post on Inner Joins we used the example of a Customer Table and an Order Table to produce a single row of data which displayed a Customer Name with his or her Order.  For a record to appear in the query results the Inner Joine required each customer (in tblCustomer) to have at least one order (in tblOrder) and vice versa.  It is at this point that Inner Join and Outer Join Queries differ.

Suppose for example, we had a number of customer records with no corresponding orders in the orders table (lets say the orders were accidentally deleted at some point).  If we run an Inner Join Query, those customers without order records would not show in the results.  However, if we run an Left Outer Join Query all customers would appear regardless of whether or not they had corresponding records in the order table (provided, of course, the customer met any query criteria which was set). If a customer had no corresponding order records his or her query results row will just contain the customer's details with empty fields in place of order details.

This brings me to one last point: we need to specify whether the Join is a Left Join or Right Join.  So what does this mean?  Basically by selecting whether the Outer Join Query is left or right, we are letting Access know which table in the Join is going to display all the rows matching a given criteria, and which side will only display data corresponding to that chosen table.

Lets now have a go at creating an Outer Join Query.  The exercise below uses two tables, tblCustomer and tblOrder.  We are going to use the FIRSTNAME, SURNAME and CITY fields from the customer table, and ITEMORDERED and DATE from the orders table.  Our query criteria will filter out all customers who live in Bolton.  You can download an Access Database with these tables here, or enter them manually from the screenshots below:

Above: Date for tblCustomer.
Below: Data for tblOrder.

NB There is a One to Manly Relationship between the two tables
between tblCustomer.ID and tblOrder.CustomerId.


How to Create an Outer Join Query


We are going to do this exercise in two stages.  The first stage is to create a standard Inner Join query using the Access Query Design Grid. In the second stage with will modify the query so it becomes an Outer Join Query.


Stage One - Create an Inner Join Query.
  1. Open the database you downloaded above.
  2. Select the CREATE tab on the Access Ribbon.
  3. Click the QUERY DESIGN icon in the OTHER group.
  4. Select tblCustomer and tblOrder from the SHOW TABLE dialogue box.  Then close the dialogue box.  Both tables should now have appeared in the top section of the QUERY DESIGN GRID.  Since there is already a one to many relationship between the two tables, this is represented in the Query Design Grid as an Inner Join.
  5. Select fields FirstName, Surname, and City from tblCustomer.  Then select fields ItemOrdered and Date from tblOrder.
  6. Enter the query criteria ="bolton" in the CRITERIA row of the CITY column in the lower section of the grid.  
Your query should now look like the screen shot below:


If you run the query now (before we change it to an Outer Join Query) you should get this result shown below:

Above: the query run as an Inner Join before modification.


You may notice that although our customer table contained two records with Bolton as the City (our criteria), only one record was displayed.  This is due to the fact that we ran the query as an Inner Join and the excluded record that has no corresponding order in the tblOrder table.

Lets see what happens when we change the query to an Outer Join type:

Stage Two - Modify the Query to an Outer Join.


  1. Open the Inner Join query we just created in DESIGN VIEW.  The QUERY DESIGN GRID opens.
  2. Double click the Join between the two tables to bring up the JOIN PROPERTIES dialogue box.

    The JOIN PROPERTIES dialogue box.

    Notice how the Join Properties box shows the Left Table Name (tblCustomer) and the Right Table Name (tblOrder). This ties in with what we discussed above regarding Left and Right Joins. We want all customers to be displayed regardless of whether they have a corresponding record in the orders table.  As tblCustomer is the Left Table shown in the JOIN PROPERTIES BOX we need to modify our query to a Left Outer Join.  To do this we need to click Option Two where it says "Include ALL records from 'tblCustomer' and only those records from 'tblOrder' where the joined fields are equal".  
  3. Click Option 2 in the JOIN PROPERTIES dialogue box and click OK.
Your Left Outer Join is now in place.  It is represented in the Query Design Grid like this:

Representation of the Left Outer Join in
the Query Design Window.
Notice the joining line between the two tables now has an arrow pointing from left to right, ie from tblCustomer to tblOrder.  Our query will show all records in tblCustomer (matching our ='bolton' criteria, and only orders corresponding to those customers matching the set criteria.  Lets run the query and see:

Results from the modified Left Outer Join Query.

Now both customers from Bolton appear in the query results.  As you can see, Andrew Johnson's record has no corresponding records in the orders table.  When we ran the Inner Join Query previously, this customer did not feature in the results for that reason.  Now that we have modified it to a Left Outer Join Query, this customer record is no longer excluded.

Now then, suppose we removed the criteria from this query and added a new order record in tblOrder without a corresponding customer record.  What do you think would show if we ran the Left Outer Join Query again?  Please feel free to try this.  You will see that all customers with their corresponding orders are displayed.  However, our new order record (without a corresponding customer) is excluded from the query results.  See what happens next if we modify the Join to a Right Outer Join Query.  Do this by :

  1. Opening the Query Design Window.
  2. Double clicking the existing Join line between the tables to open the JOIN PROPERTIES dialogue box.
  3. Select Option Three where it says "Include all records from 'tblOrder' and only those orders from 'tblCustomer' where the join fields are equal"
This has changed our Query to a Right Outer Join.  Trying running the query now.  

Query results when from a Right Outer Join.

The new order record now appears in the results whilst the customer record with no order is now excluded.  This is the difference between a Left Outer Join Query and a Right Outer Join Query.  As such we see that having a Left or Right Join determines which table is effectively 'leading' the query.